How Bread Dough Works and How to Make Better Yeast Bread
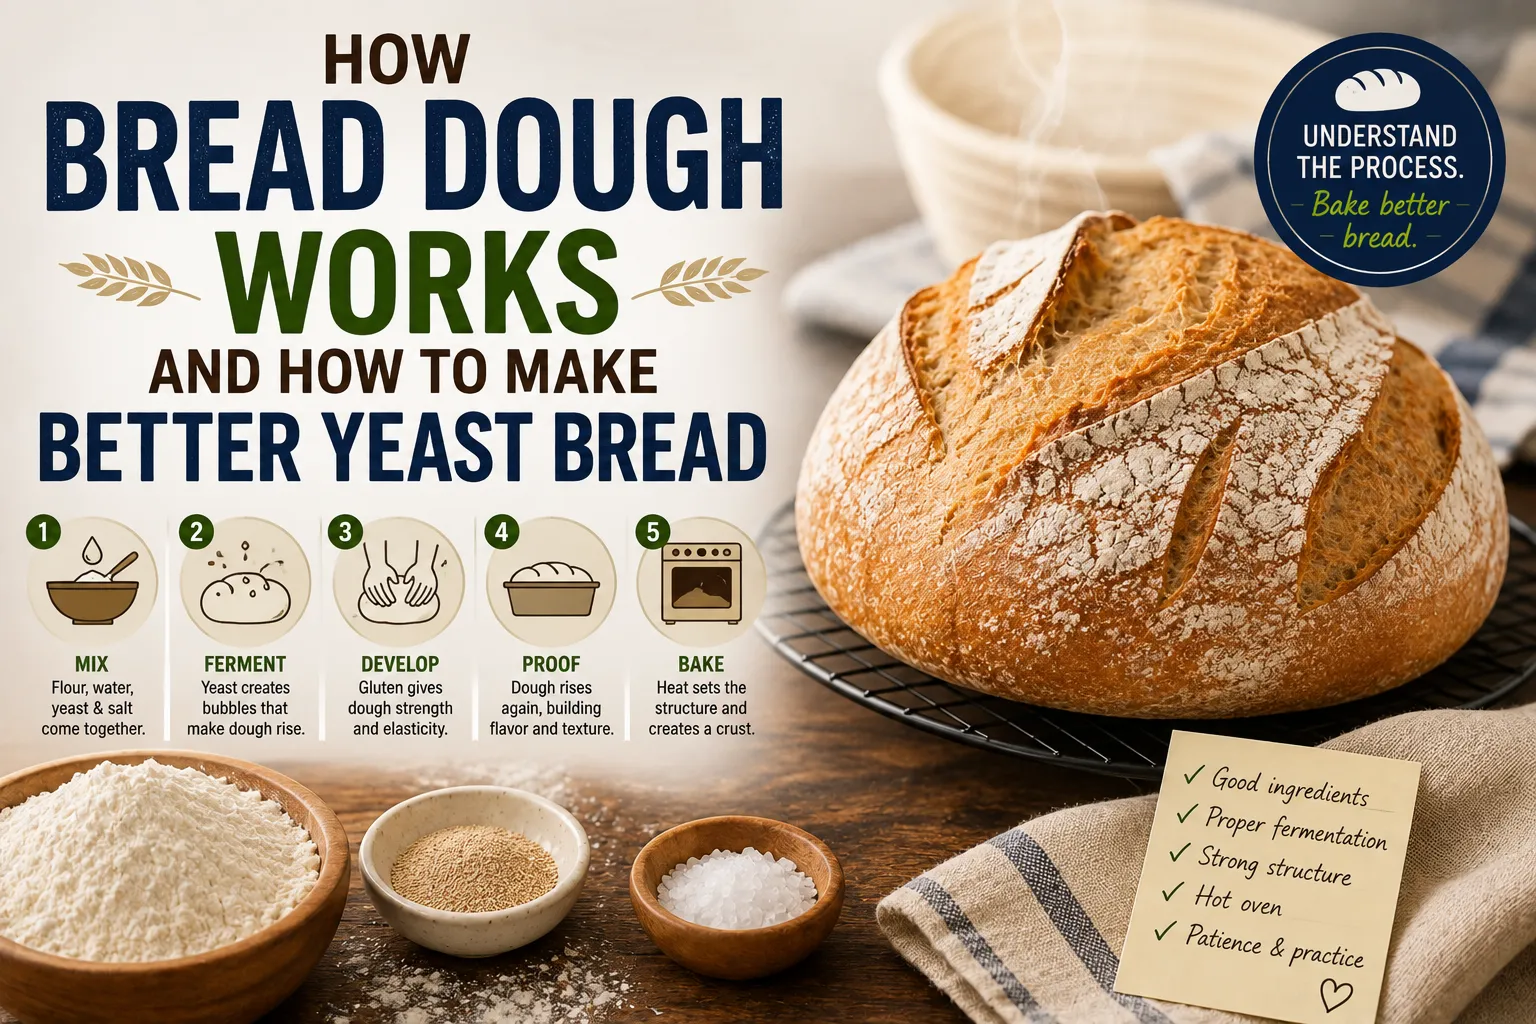
How Bread Dough Works and How to Make Better Yeast Bread
Bread looks simple on the outside: flour, water, yeast and perhaps a little salt, shaped into a loaf and baked until golden.
Inside the dough, however, a remarkable series of chemical and biological processes is taking place.
Flour absorbs water. Proteins develop into gluten. Yeast consumes sugars and produces carbon dioxide. The dough expands as gas becomes trapped inside its elastic structure. Heat then transforms the soft dough into a firm loaf through a combination of fermentation, protein coagulation, starch gelatinization and browning.
Understanding those processes makes homemade bread much easier to master.
Instead of relying entirely on a recipe, you can begin to recognize what dough should look and feel like, understand why it behaves differently from one day to another, and make adjustments when something goes wrong. These fundamentals also fit into the broader skills covered in the Complete Guide to Cooking for Beginners.
What Is Bread Dough?
Bread dough is a mixture of flour, water and other ingredients that has been developed enough to create a structure capable of holding the gases produced during fermentation.
A basic yeast bread may contain:
- Flour
- Water
- Yeast
- Salt
Many recipes also include:
- Sugar
- Milk
- Butter
- Oil
- Eggs
- Seeds
- Herbs
- Dried fruit
Each ingredient affects the dough in a different way.
Flour provides the structural foundation. Water hydrates the flour. Yeast creates fermentation gases. Salt controls flavor and dough development.
Additional ingredients can change tenderness, richness, browning, moisture and shelf life.
Flour Provides the Structure
Flour is the foundation of most bread doughs.
Wheat flour is particularly useful for yeast bread because it contains proteins that can form gluten when hydrated and mixed.
The two major gluten-forming proteins are gliadin and glutenin.
When flour and water are combined, these proteins begin interacting.
As the dough is mixed, folded or kneaded, the proteins form an interconnected network.
That network gives bread dough its characteristic elasticity and helps it retain the carbon dioxide produced by yeast.
What Is Gluten?
Gluten is the protein network that develops when wheat flour is hydrated and mechanically worked.
It provides two particularly important qualities:
Elasticity: the ability of dough to stretch.
Strength: the ability of dough to resist tearing and hold its shape.
Good bread requires a useful balance between the two.
If dough is too weak, it may spread rather than rise upward.
If it becomes excessively tight, it may resist expansion and produce a dense loaf.
The goal is not simply to develop as much gluten as possible.
The goal is to develop the right structure for the type of bread you are making.
Why Water Matters So Much
Water may appear to be a basic ingredient, but it has an enormous effect on bread dough.
It hydrates flour, allows gluten proteins to interact and helps enzymes and yeast function.
The amount of water relative to flour is commonly expressed as hydration.
For example, if a recipe uses 700 grams of flour and 490 grams of water:
490 ÷ 700 × 100 = 70% hydration
A 70% hydration dough is considerably wetter than a 55% hydration dough.
Higher-hydration doughs are generally softer and stickier but can produce bread with a more open crumb.
Lower-hydration doughs are firmer and easier to shape but may produce a tighter texture.
Why Some Doughs Feel Sticky
A sticky dough is not necessarily a failed dough.
High-hydration doughs naturally feel wetter.
Freshly mixed dough can also seem sticky before the flour has fully hydrated and gluten has developed.
Instead of immediately adding large amounts of flour, give the dough time.
Resting can allow the flour to absorb water and can make the dough easier to handle.
This is one reason experienced bakers often resist the temptation to keep adding flour whenever dough feels sticky.
The Role of Yeast
Yeast is a living microorganism used to ferment bread dough.
When conditions are suitable, yeast consumes available sugars and produces:
- Carbon dioxide
- Alcohol
- Other fermentation compounds
The carbon dioxide becomes trapped within the developing dough structure.
Those gas bubbles expand, causing the dough to rise.
Fermentation also contributes to the flavor and aroma of bread.
That means yeast is doing more than simply making bread rise.
What Yeast Needs to Work
Yeast performs best under suitable conditions of:
- Temperature
- Moisture
- Food availability
- Time
Warm conditions generally speed fermentation, while cooler conditions slow it.
This is why bread dough can rise quickly in a warm kitchen but take considerably longer on a cold day.
However, faster is not always better.
Slower fermentation can give the dough more time to develop flavor.
Don’t Use Water That Is Too Hot
One of the easiest ways to create problems with yeast bread is using excessively hot water.
Very hot water can damage or kill yeast.
Water should generally feel comfortably warm rather than scalding when working with yeast.
The exact temperature depends on the type of yeast, recipe and method, so following the recipe’s instructions is the safest approach.
Remember that dough temperature is influenced by more than the water.
The flour, mixing bowl, kitchen and other ingredients can all affect the final dough temperature.
Instant Yeast and Active Dry Yeast
Home bakers commonly encounter several forms of commercial yeast.
Instant yeast can generally be mixed directly into the dry ingredients.
Active dry yeast is also widely used and may be mixed directly into flour or, depending on the product and recipe, dissolved in liquid first.
There are also fresh yeast products, which contain considerably more moisture and are handled differently.
Always check the instructions for the specific yeast you are using rather than assuming that every type behaves identically.
What Salt Does in Bread
Salt is essential for more than flavor.
It affects yeast activity, gluten development and the overall character of the dough.
Salt helps regulate fermentation.
Without enough salt, bread can taste flat and fermentation can proceed too quickly.
This is one reason salt should not be treated as an optional ingredient in a standard yeast bread recipe.
For a broader understanding of how salt and other flavors work together in food, see How to Season Food With Herbs, Spices, Salt and Other Flavors.
Sugar Has Several Roles
Sugar can contribute sweetness, but its role in bread can extend beyond flavor.
Depending on the recipe, sugar can:
- Provide additional food for fermentation
- Encourage browning
- Increase tenderness
- Help retain moisture
- Add sweetness
However, bread can rise perfectly well without added sugar because flour naturally contains starch that can be broken down into fermentable sugars.
Many traditional bread recipes contain little or no added sugar.
Fat Makes Bread More Tender
Butter, oil and other fats can soften the texture of bread.
Fat coats some of the flour components and can interfere with strong gluten development, producing a more tender crumb.
This is why enriched breads often feel softer and richer than lean breads made primarily from flour, water, yeast and salt.
Examples of enriched breads include:
- Brioche
- Milk bread
- Some dinner rolls
- Many sweet breads
The amount and type of fat can dramatically change the finished loaf.
Eggs Add Richness and Structure
Eggs can contribute:
- Fat
- Protein
- Moisture
- Color
- Structure
Egg-rich breads often have a softer texture and richer flavor.
The yolk contributes fat and emulsifying components, while the white contains proteins that can contribute to structure.
The First Stage: Mixing
When flour and water first come together, the dough can look rough and uneven.
That is normal.
At this stage, flour particles are absorbing water and the gluten-forming proteins are beginning to interact.
Mixing distributes the ingredients and begins developing the dough’s structure.
Depending on the recipe, the dough may initially look shaggy before becoming smoother.
Resting Can Improve the Dough
Some bread-making methods include a resting period after flour and water are initially combined.
One well-known approach is the autolyse, where flour and water are mixed and allowed to rest before other ingredients or intensive mixing are added.
During the rest, flour hydrates and natural enzymatic activity begins.
This can make dough easier to develop and shape.
Even when a recipe does not use a formal autolyse, simply allowing a rough dough to rest for a short period can sometimes make it feel noticeably different.
Kneading Develops Gluten
Kneading involves repeatedly stretching and folding the dough.
This helps organize the gluten network.
A well-developed dough may become:
- Smoother
- More elastic
- Less ragged
- Better able to stretch without tearing
Traditional kneading is not the only way to develop gluten.
Stretch-and-fold techniques can accomplish much of the same structural work, particularly with wetter doughs.
The Windowpane Test
One traditional way to assess gluten development is the windowpane test.
Take a small piece of dough and gently stretch it between your fingers.
If the dough can stretch into a thin membrane without immediately tearing, gluten development is relatively strong.
If it tears easily, more development may be needed.
The test is useful, but it should not become an obsession.
Different breads require different levels of gluten development.
A rustic loaf and a soft sandwich bread do not necessarily need to feel identical.
First Rise: Bulk Fermentation
After mixing and developing the dough, yeast fermentation begins in earnest.
This stage is often called bulk fermentation.
The dough is allowed to rise as yeast produces carbon dioxide.
During this period, fermentation also develops flavor.
The dough may:
- Increase in volume
- Become lighter
- Develop bubbles
- Become more elastic
- Smell increasingly fermented
The exact amount of rise needed depends on the recipe.
Don’t Judge Fermentation by the Clock Alone
Recipes often say something like “let rise for one hour.”
That is a useful starting point, but it is not an absolute rule.
Fermentation speed changes with:
- Room temperature
- Dough temperature
- Yeast quantity
- Flour type
- Hydration
- Sugar content
- Salt content
- Dough size
A dough that takes one hour to rise in a warm kitchen might take considerably longer in a cool room.
Learning to read the dough is more reliable than following the clock blindly.
What Overproofed Dough Looks Like
If dough ferments for too long, its structure can eventually weaken.
An overproofed dough may:
- Become excessively puffy
- Feel fragile
- Collapse easily
- Spread during shaping
- Have difficulty holding its structure
The finished bread may be flatter and less springy.
Overproofing is particularly common when bakers assume that more rising automatically means better bread.
It does not.
The goal is controlled fermentation.
What Underproofed Dough Looks Like
Underproofed dough has not fermented enough before baking.
It may feel:
- Dense
- Tight
- Resistant
- Heavy
The finished loaf can have a compact crumb and may split unexpectedly during baking.
The bread may also have a strong “yeasty” character without the more developed flavors associated with proper fermentation.
The Finger-Poke Test
For some shaped loaves, bakers use the finger-poke test to estimate proofing.
Press a fingertip gently into the dough.
If the indentation springs back immediately, the dough may need more time.
If it slowly returns and retains a slight indentation, it may be appropriately proofed.
If the dough barely springs back and appears fragile, it may be overproofed.
This is only a guide, but it can be useful when combined with experience.
Shaping Creates Structure
After bulk fermentation, the dough is divided and shaped.
Shaping is not simply about making the loaf look attractive.
It creates surface tension.
That tension helps the dough maintain its shape while it undergoes its final rise and enters the oven.
A properly shaped loaf can therefore rise upward more effectively than poorly shaped dough.
Why Surface Tension Matters
Imagine gently pulling a piece of dough across a smooth surface.
The outer layer becomes tighter.
That tension creates a supportive skin around the dough.
When the loaf enters the oven, this surface can expand along with the internal gas.
Good shaping helps control where and how the bread expands.
The Final Proof
After shaping, the dough typically undergoes another period of fermentation.
This is often called the final proof.
During this stage, the shaped loaf becomes lighter and more aerated.
The timing depends on the recipe and environmental conditions.
Again, the goal is not necessarily to maximize volume before baking.
The dough needs enough fermentation to develop structure and gas without becoming so overproofed that it collapses.
Why Scoring Bread Matters
Many crusty breads are scored before baking.
Scoring creates deliberate weak points in the dough’s surface.
When the loaf expands rapidly in the oven, it can open along these cuts rather than bursting randomly.
Scoring can also become part of the loaf’s visual identity.
Simple lines, crosses and decorative patterns can produce dramatically different appearances.
What Happens When Bread Enters the Oven?
The first part of baking can produce a dramatic expansion known as oven spring.
Several things happen rapidly:
- Gases expand.
- Yeast activity temporarily accelerates.
- Water turns into steam.
- Dough structure expands.
- Proteins begin setting.
- Starches gelatinize.
Eventually, the increasing heat kills the yeast and sets the bread’s structure.
The dough changes from a flexible, living system into a stable baked loaf.
Steam Helps Create a Better Crust
Steam is particularly important during the early stage of baking crusty bread.
A humid baking environment helps keep the dough’s surface flexible for longer, allowing the loaf to expand before the crust sets.
This can contribute to:
- Better oven spring
- A thinner, crispier crust
- Improved surface appearance
Professional bread ovens are designed to introduce steam precisely.
Home bakers can reproduce some of the effect using appropriate covered baking vessels or carefully designed steam methods.
Why Dutch Ovens Work So Well
A covered Dutch oven traps moisture released by the dough.
This creates a humid environment around the loaf during the initial stages of baking.
It can be particularly effective for rustic sourdough-style and lean breads.
The result can include strong oven spring and a deeply browned crust.
The heavy vessel also provides stable heat.
The Maillard Reaction Creates Browning
The beautiful brown crust on bread is partly the result of the Maillard reaction.
This is a series of chemical reactions involving amino acids and reducing sugars that occur at elevated temperatures.
It produces many of the flavors and aromas associated with browned foods.
This is why a pale loaf and a deeply browned loaf can have noticeably different flavors even when they began with the same dough.
Caramelization Plays a Role Too
Caramelization involves the thermal breakdown of sugars.
Together with the Maillard reaction, it contributes to the color, aroma and flavor of baked bread.
Factors such as:
- Baking temperature
- Dough composition
- Sugar content
- Moisture
- Baking time
can all influence the final crust.
Why Bread Needs to Cool Before Slicing
Freshly baked bread can be extremely tempting.
But cutting into it immediately can damage the crumb.
As bread cools, its internal structure continues to stabilize.
Starches and moisture redistribute, allowing the crumb to become firmer and more cohesive.
Cutting too early can produce a gummy or compressed interior even when the bread was properly baked.
Allow the loaf to cool sufficiently before slicing.
How to Make Better Yeast Bread at Home
Improving bread does not require buying every specialized baking tool.
A few fundamentals make a much bigger difference.
1. Weigh Your Ingredients
A kitchen scale is one of the most useful investments for bread baking.
Measuring flour by volume can produce significant differences because a cup of flour can weigh different amounts depending on how it is scooped and packed.
Using weight provides much greater consistency.
2. Learn Baker’s Percentages
Professional bakers often express ingredients relative to the amount of flour.
Flour is always treated as 100%.
For example:
- Flour: 100%
- Water: 70%
- Salt: 2%
- Yeast: 1%
This makes recipes easier to scale.
It also helps you understand the relationship between ingredients rather than memorizing isolated measurements.
3. Pay Attention to Dough Temperature
Temperature strongly affects fermentation.
A warm dough generally ferments faster.
A cooler dough generally ferments more slowly.
Instead of trying to force every batch to follow exactly the same clock schedule, observe how temperature affects the dough.
4. Give Flour Time to Hydrate
If dough feels rough or unusually sticky immediately after mixing, don’t automatically assume something has gone wrong.
A short rest can change its texture considerably.
Time is an ingredient in bread making.
5. Avoid Adding Too Much Flour
This is one of the most common beginner mistakes.
A baker sees sticky dough and keeps adding flour until it becomes easy to handle.
The result can be a dry, dense loaf.
Instead, try:
- Resting the dough
- Wetting or lightly oiling your hands
- Using a bench scraper
- Developing the gluten
- Folding the dough
A little stickiness is often normal.
6. Use Stretch-and-Fold Techniques
For wetter doughs, stretch-and-fold techniques can be easier than traditional kneading.
During the first part of fermentation, gently stretch one side of the dough and fold it over itself.
Repeat around the dough.
Several rounds of folds can gradually strengthen the dough without requiring constant kneading.
7. Let Fermentation Develop Flavor
Fast bread can be convenient, but longer fermentation can produce more complex flavor.
Reducing the yeast and allowing the dough to ferment more slowly can be one approach.
Refrigerating dough for an extended fermentation period can also slow yeast activity while allowing flavor development.
The exact timing depends on the recipe.
8. Don’t Let the Dough Overproof
More fermentation is not automatically better.
Learn to recognize how properly fermented dough behaves.
Pay attention to:
- Volume
- Elasticity
- Bubbles
- Surface appearance
- Response to gentle pressure
Over time, these cues become easier to recognize.
9. Shape With Purpose
Take time to create surface tension.
A loaf that is shaped carefully is more likely to hold its form during final proofing and baking.
10. Preheat Thoroughly
Bread benefits from a properly heated oven.
A fully preheated oven provides the thermal energy necessary for oven spring and crust development.
If using a baking stone, steel or heavy Dutch oven, allow adequate preheating time according to the equipment and recipe.
Choosing the Right Flour
Different flours behave differently.
Bread flour
Typically has relatively high protein content and can produce strong gluten development.
It is useful for many chewy, structured breads.
All-purpose flour
Can work for a wide range of breads and is often convenient for home baking.
Its protein content varies by brand and region.
Whole-wheat flour
Contains more of the wheat grain, including bran and germ.
Whole-wheat dough can be more challenging because bran particles can interfere with gluten development and the dough absorbs more water.
Rye flour
Rye behaves differently from wheat because it does not form the same gluten network.
Rye breads therefore require different techniques and expectations.
For a broader look at how flour and other ingredients behave in the kitchen, the Cooking Ingredients Guide is a useful companion resource.
Why Whole-Wheat Bread Can Be Denser
Whole-wheat flour contains bran and germ in addition to the starchy endosperm.
Bran can physically interfere with gluten development.
Whole-wheat flour can also absorb considerable amounts of water.
This means a whole-wheat loaf may require:
- More hydration
- Different mixing
- More fermentation control
- Different shaping expectations
Adding some whole-wheat flour to a predominantly white-flour dough can be an easier starting point than immediately making a 100% whole-wheat loaf.
How Enriched Dough Behaves Differently
A dough containing butter, eggs, milk and sugar behaves differently from a lean dough.
Fat can slow gluten development.
Sugar can compete for available water and affect fermentation.
Eggs and dairy add richness and change the crumb.
This is why brioche and similar breads often require different mixing and fermentation techniques.
Why Bread Sometimes Comes Out Dense
Dense bread can have several causes.
Possible reasons include:
- Too little fermentation
- Over-fermentation followed by collapse
- Weak gluten development
- Excessive flour
- Incorrect yeast handling
- Poor shaping
- Insufficient oven heat
- Heavy whole-grain content
- Dough that was too dry
Rather than changing everything at once, identify which stage of the process appears to have gone wrong.
Why Bread May Collapse
A loaf can collapse because its internal structure is too weak to support its own expansion.
This can happen when dough is significantly overproofed.
It can also result from:
- Weak gluten
- Poor shaping
- Excessive hydration
- Insufficient structural development
If a loaf repeatedly collapses, examine the fermentation and shaping stages before simply changing the oven temperature.
Why Bread May Have a Thick, Hard Crust
A very thick crust can result from:
- Excessive baking time
- Low humidity during early baking
- An unsuitable oven temperature
- Insufficient dough hydration
- A recipe designed for a different type of bread
For crusty artisan bread, a thick crust may be desirable.
For sandwich bread, it may not be.
The “right” crust depends on the intended loaf.
Why Bread May Have a Pale Crust
A pale loaf can result from:
- Insufficient baking
- Low oven temperature
- High moisture
- A dough with limited browning sugars
- Excessive steam late in the bake
If the interior is fully baked but the crust remains pale, increasing the final stage of baking may help.
Why the Crumb Has Large Holes
Large irregular holes can be desirable in rustic breads.
But if a sandwich loaf develops giant cavities while the rest of the crumb is dense, something may be wrong.
Potential causes include:
- Uneven shaping
- Excessive fermentation
- Insufficient degassing for the style
- Inconsistent gluten development
- Very high hydration
The desired crumb depends on the bread.
A baguette and a sandwich loaf should not have identical internal structures.
How to Store Homemade Bread
Fresh bread generally has a relatively short shelf life because it lacks many commercial preservatives.
For bread you plan to eat within a few days, storage at room temperature in an appropriate bread bag or container can help maintain texture.
Refrigeration can make bread stale more quickly because of changes in starch structure.
For longer storage, freezing is often a better option.
Slice the bread before freezing if you expect to use individual portions.
Why Homemade Bread Stales
Bread does not simply “dry out” as it becomes stale.
Staling involves changes in the starch structure and redistribution of moisture.
The crumb gradually becomes firmer while the crust can lose its crispness.
Reheating can temporarily improve the texture because heat changes the starch structure and redistributes moisture.
Bread Baking Is a Process, Not a Formula
One of the biggest changes that occurs when a beginner becomes a more experienced baker is learning to stop treating recipes as rigid instructions.
A recipe might say:
“Knead for 10 minutes.”
But dough can develop at different speeds.
Another recipe might say:
“Let rise for one hour.”
But fermentation depends on temperature, yeast activity and dough composition.
The better approach is to use the recipe as a framework while learning to read the dough itself.
Learn to Read Your Dough
Ask questions throughout the process:
After mixing: Is the flour fully hydrated?
After kneading: Is the dough becoming elastic?
During bulk fermentation: Is the dough expanding and developing bubbles?
During shaping: Does it have enough strength to hold its form?
During final proof: Is it aerated without becoming fragile?
After baking: Is the crust properly browned and the crumb fully set?
These observations are more valuable than memorizing a single perfect timing.
A Reliable Basic Yeast Bread Formula
For a straightforward loaf, a baker can start with a simple formula built around:
- 100% flour
- Approximately 65–70% water
- Around 2% salt
- A modest amount of commercial yeast
For example, using 500 grams of flour:
- 500 g flour
- 325–350 g water
- 10 g salt
- Yeast according to the desired fermentation schedule
This is only a starting point.
The exact water level should be adjusted according to the flour and desired dough consistency.
A Simple Bread-Making Workflow
Mix
Combine the flour, water, yeast and salt according to the recipe.
Rest
Allow the flour to hydrate if the method calls for a resting period.
Develop
Knead or use folds to develop the dough.
Bulk ferment
Allow the dough to rise while fermentation develops flavor and structure.
Divide and shape
Create the desired loaf shape and surface tension.
Proof
Allow the shaped dough to rise again.
Score
Make deliberate cuts when appropriate.
Bake
Use a properly preheated oven and suitable steam or covered-baking method.
Cool
Allow the loaf to cool before slicing.
This sequence is simple, but each stage affects the next.
The Biggest Improvement Comes From Observation
Bread baking can initially seem unpredictable.
One loaf may rise beautifully while another made from the same recipe seems completely different.
But that variability is also what makes bread interesting.
Once you understand that flour absorbs water differently, temperature changes fermentation, gluten controls structure and yeast responds to its environment, the process becomes much less mysterious.
You can start adjusting rather than guessing.
Better Bread Comes From Understanding the Dough
Great homemade bread does not require an enormous collection of equipment or complicated recipes.
It requires an understanding of what the ingredients are doing.
Flour creates the structural foundation.
Water hydrates the flour and determines dough consistency.
Gluten provides elasticity and strength.
Yeast creates fermentation gases and flavor.
Salt regulates fermentation and improves taste.
Time develops the dough.
Heat transforms it into bread.
When those elements are balanced, even a simple combination of flour, water, yeast and salt can produce an extraordinary loaf.
The most useful skill is therefore not memorizing a recipe. It is learning to recognize what the dough is telling you at every stage—from the moment flour meets water to the moment a properly cooled loaf is sliced open.